As instructors of Adobe programs and creative professionals, we’ve assembled this blog as an easy reference for our students and clients.” Miriam Selmi Reed & Michael Alan Reed
Deutsche Version siehe unten!
![]()
English version:
TIP OF THE WEEK: Cool InDesign Trick part 2
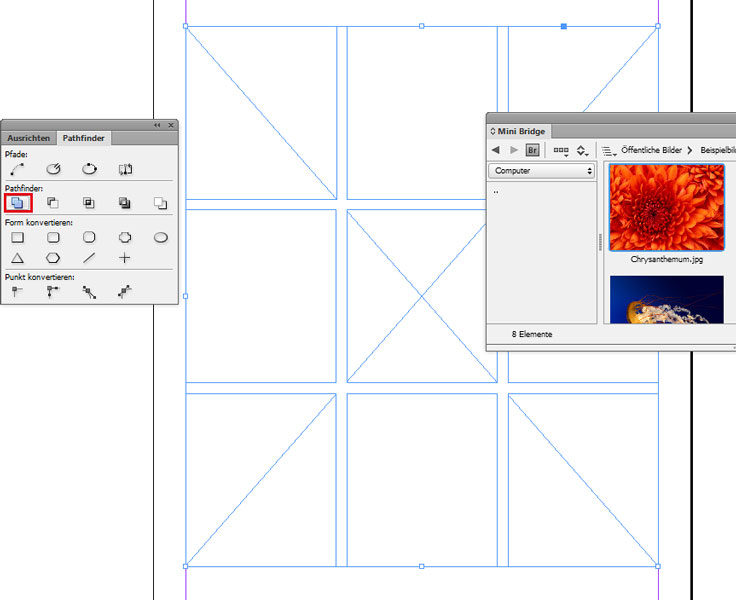
1. Draw 9 squares in InDesign using the Rectangle Frame Tool. Tip: InDesign Trick Part 1
2. If possible open the MINI BRIDGE – then select all 9 squares at the same time using the Selection-Tool and open the PATHFINDER under WINDOW > OBJECT & LAYOUT.

3. In the PATHFINDER window select the button “Add: Combines selected objects into one shape”. Now your 9 squares are ready to be filled in with one image…

4. Either drag your image of your choice from the MINI BRIDGE into the image box or simply go to MENU > FILE > PLACE

Sharing infos & tips: iADOBE FORUM – Our tips: i-adobe eBook in English
![]()
Deutsche Version!
TIPP DER WOCHE: Cool InDesign Trick Teil 2
1. Zeichne 9 Quadrate in InDesign mit dem Rechteckrahmen-Werkzeug. Tipp: InDesign Trick Teil 1
2. Wähle nun mit dem Auswahl-Werkzeug alle 9 Quadrate gleichzeitig an und öffne den PATFINDER unter FENSTER > OBJEKT & LAYOUT.

3. Im PATHFINDER Fenster wähle den Button “Addieren: Die ausgewählten Objekte werden zu einer gemeinsamen Form kombiniert”.
4. Jetzt kann man ein Bild entweder von der MINI BRIDGE direkt hineinziehen oder unter MENÜ > DATEI > PLATZIEREN

![]()
Tausche dich aus im iADOBE FORUM! Unsere Tipps: i-adobe eBook in Deutsch
