
Informationen und Download: affinity.serif.com/de
Die gesamte Affinity-Suite (inklusive Publisher für iPad!) auf allen Geräten – egal ob macOS, Windows oder iPadOS.
Nun kannst du jederzeit und überall mit der kompletten App-Suite auf sämtlichen Plattformen arbeiten!
Was ist NEU? affinity.serif.com/de/whats-new
Tutorials: affinity.serif.com/de/learn
Ich habe diese Illustration für NOTABENE auf dem IPadOS mit Adobe Fresco gezeichnet, da es Pixel und Vektoren mischt. Mit der neuen Universallizenz, kann ich nun auf dem IpadOS mit Affinity Designer zeichnen und später auf dem Laptop. One App, dieselbe Plattform!

Illustration by Miriam Selmi Reed for the magazine NOTABENE
How to create Pie Charts with Affinity Publisher & Designer. (English version):
Wie man Kuchengrafiken mit Affinity Publisher & Designer erstellt. (Deutsche Version):
ZIGGY book illustrated with Affinity Designer by Miriam Selmi Reed, © REEDaround Books
Nach wie vor arbeite ich mit ADOBE und unterrichte diese Programme sehr gerne. Seit ein paar Jahren benutze ich jedoch AFFINITY Programme auch in der Praxis: Hier meine 7 gute Gründe für AFFINITY!”
Die coolsten Features von Affinity kurz zusammengefasst:
-Affinity verlangt keine Abo-Zahlungen
-Affinity ist cloud frei
-Gratis updates für Mac und Windows
-Affinity Publisher ist via StudioLink mit Affinity Designer und Affinity Photo vernetzt.
Verfügst du über die beiden anderen Programme, kannst du ohne Wechsel des Programms sämtliche Arbeitsschritte im selben Programm vornehmen.
-kostenlose Testversion für Mac und Windows

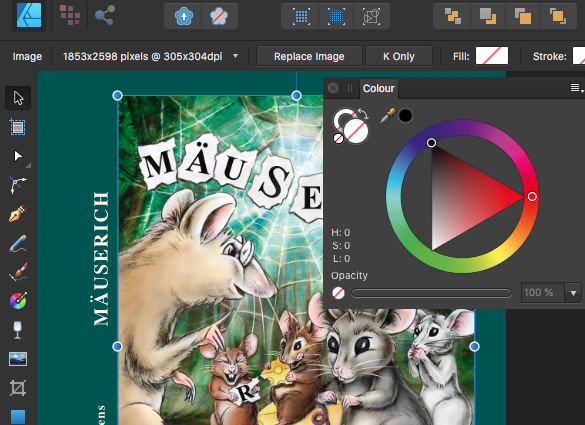
Cover-Titel erstellt mit AFFINITY Designer für die ZIGGY Kinderbücher.
Erhältlich via Vier Pfoten Schweiz, Bärenland Arosa oder Buchhandel.
AFFINITY Designer Zeichenstift: Vektor Linien mit verschiedenen Linienstärken zeichnen.
Zeichnen eines Vektorpfades mit dem Zeichenstift in der Vektor-Persona von AFFINITY Designer: Verschiedene Linienbreiten mit der “Druck-Option” herstellen.
Erstellen von Verläufen innerhalb von Konturen in der Vektor-Persona von AFFINITY Designer: Markers setzen und zusätzliche Farben mit dem Farbrad definieren. Miriam Selmi Reed von REEDesign präsentiert anhand ihres Beispiels (Ziggy Books) wie sie Verläufe in Affinity Designer erstellt.
Meine nächsten AFFINITY Designer Kurse finden bei digicomp statt.
Digicomp Trainer-Info: Miriam Selmi Reed
RUN ZIGGY RUN bilingual children’s books / zweisprachige Kinderbücher
Illustrations by Miriam Selmi Reed & Text by: Michael Alan Reed
Available at / Erhältlich bei: REEDaround Books
![]()
Seit dem Beginn der Corona-Krise, haben wir online Workshops mit ZOOM oder TEAMS durchgeführt. Wir können euch jederzeit online mit Adobe oder Affinity Fragen helfen. Ab sofort buchbar: WEBINARE und persönliche ONLINE Beratung
Das i-adobe Ebook inklusive Filme, auf 72 Seiten ist hier erhältlich: SICHERER DOWNLOAD
The i-adobe Ebook including films, is available here on 72 pages: EASY DOWNLOAD
My personal AFFINITY Designer Tutorials directly from AFFINITY Serif!
Hier die coolsten Features von Affinity zusammengefasst:
-Serif verlangt keine Abo-Zahlungen
-Affinity ist cloud frei
-Gratis updates für Mac und Windows
-Designer ist via StudioLink mit Publisher und Photo vernetzt. Verfügst du über die beiden anderen Programme, kannst du ohne Wechsel des Programms sämtliche Arbeitsschritte im selben Programm vornehmen.
-kostenlose Testversion für Mac und Windows
-Sprachwechsel möglich via Einstellungen
Tipp: Kennenlernen der Einstellungen. Unter Bearbeiten > Einstellungen können Sie Sprachwechsel und andere Einstellungen des Programms vornehmen.
Affinity Designer Tutorials (V1) – The Affinity Version 1 Tutorial playlist
3. Zoomen, drehen und bewegen der Leinwand: Zoom, turn and move your canvas!
4. Platzieren von Fotos: Placing images!
5. Das Protokoll-Bedienfeld: Work and safe with the History!
6. Kopieren, einfügen, duplizieren und mehr: Copy, paste, duplicate and more!
7. Form-Werkzeuge: Shape tools!
8. Gruppieren von Objekten: Group and ungroup objects!
9. Transformieren von Objekten: Transform objects!
10. Auswählen von Objekten: Select objects!
11. Ecken-Werkzeuge: Corner tools!
12. Ausrichten und verteilen: Align and distribute!
13. Magnetische Objektausrichtung: Object snapping!
14. Mit Ebenen arbeiten: Layer panel!
15. Organisieren von Ebenen-Inhalten: Organise layer content!
16. Expandieren von Linien: Expand strokes!
17. Raster mit 2 und 3 Achsen: Square and triangular raster!
18. Perspektive isometrisch zeichnen: Drawing with isometric panel!
19. Einrichtungsmöglichkeiten für Rasterachsen: Using axonometric raster!
20. Ansichtsmodi für Pixel-/Vektor-Vorschau: Pixel and vector view modes!
21. Assets-Panel: Assets-Panel!
22. Symbole: Symbols!
23. Artboards für verschiedene Designelemente: Artboards!
24. Lineal- und Spaltenhilfslinien: Ruler- and columnguides!
25. Verbinden von Elementen: non destructive pathfinder (hold down alt key)!
26. Konturen und Füllungen für Objekte: Fills and strokes in an object!
27. Punkt-Transformationen: Point-Transform-Tool!
28. Einführung in Vektor-Pinsel: Introduction to vector-brushes!
29. Verwalten von Vektor-Pinseln: Managing vector-brushes!
30. Einführung in die Pixel-Pinsel: Paint Brush Tool!
31. Gespiegeltes Malen: Mirrored painting!
32. Bleistift: Managing the pencil tool!
33. Zeichenstift: Drawing with the pen tool!
34. Knotenwerkzeug: Final adjustment with the node tool!
35. Zeichenstift mit Bezier-Kurven: Tips using the pen tool!
36. Erweiterte Kurvenfunktionen: Select, align and transform nodes!
37. Magnetische Kurvenausrichtung: Curve snapping!
38. Farboptionen: Color & swatches panel!
39. Verläufe erstellen: Gradient tool!
40. Farbpipette: Color picker tool!
41. Transparenz-Werkzeug: Transparency tool!
42. Radierer: Eraser tool!
43. Maskieren: Working with masks!
44. Auswahl-Werkzeuge in der Pixel Persona: Introduction into the selection tools!
45. Auswahlbearbeitung in der Pixel Persona: Adjust your selection!
46. Verfeinern der Auswahl in der Pixel Persona: Refine your selection!
47. Auswahlpinsel & Ebenenmaske: Selection Brush tool & layer mask!
48. Einstellungsebenen: Adjustment layers!
49. Füllwerkzeug in der Pixel-Persona: Flood Fill tool!
50. Pixel-Werkzeug in der Pixel-Persona: Pixel tool!
51. Grafiktext in der Vektor-Persona: Artistic text tool!
52. Rahmentext in der Vektor-Persona: Frame text tool!
53. Text auf Pfaden: Text on a path!
54. Exportieren von ausgewählten Slices als Dateien: Export persona!
Warum AFFINITY Designer mein Lieblingsprogramm ist…
English:
AFFINITY DESIGNER:
Introduction of AFFINITY Designer for my students – as an alternative to Adobe Illustrator!
NEWS: I’m teaching AFFINITY Designer at DIGICOMP SWITZERLAND
Affinity Designer (a vector art & design package) was launched in 2014 for macOS. It was Serif’s first product for macOS, and had been written from scratch specifically for it. This was followed in 2015 by the second Affinity product Affinity Photo (a photo editing & design package). Affinity Publisher was released in 2019.
1. Tutorial HOW TO RETOUCH in AFFINITY Designer
-Tutorial in English by Affinity: AFFINITY Designer
-Adobe Illustrator Tutorial: How to draw in Adobe Illustrator
-Our Adobe tips for easy download: i-adobe eBook in English
![]()
Deutsch:
TEIL 1 – AFFINITY DESIGNER:
Vorstellung von AFFINITY DESIGNER für meine Studenten und TeilnehmerInnen. AFFINITY Designer als Alternative zu Adobe Illustrator.
NEWS: ich unterrichte neu AFFINITY Designer Kurs bei DIGICOMP SCHWEIZ
Im Oktober 2014 wurde die App Affinity Designer im Mac-App-Store veröffentlicht. Im Juni 2015 bekam Serif für die App den Apple Design Award verliehen. Im Juli 2015 begannen die Arbeiten an Affinity Photo. 2016 wurden beide Apps mit der Version 1.5 auch für Windows veröffentlicht. Am 19. Juni 2019 erschien die DTP-Software Affinity Publisher.
1. Tutorial wie man in AFFINITY Designer retuschiert
-Tutorial in Englisch mit deutschen Untertiteln von Affinity: AFFINITY DESIGNER
-Adobe Illustrator Anleitung: Wie man mit Adobe Illustrator zeichnet
-Alle Adobe Tipps als: i-adobe eBook in Deutsch
English:
AFFINITY DESIGNER:
Introduction of AFFINITY Designer for my students – as an alternative to Adobe Illustrator!
NEWS: I’m teaching AFFINITY Designer at DIGICOMP SWITZERLAND
Affinity Designer (a vector art & design package) was launched in 2014 for macOS. It was Serif’s first product for macOS, and had been written from scratch specifically for it. This was followed in 2015 by the second Affinity product Affinity Photo (a photo editing & design package). Affinity Publisher was released in 2019.
1. Tutorial HOW TO DRAW LINES in AFFINITY Designer
-Tutorial in English by Affinity: AFFINITY Designer
-Adobe Illustrator Tutorial: How to draw in Adobe Illustrator
-Our Adobe tips for easy download: i-adobe eBook in English
![]()
Deutsch:
TEIL 1 – AFFINITY DESIGNER:
Vorstellung von AFFINITY DESIGNER für meine Studenten und TeilnehmerInnen. AFFINITY Designer als Alternative zu Adobe Illustrator.
NEWS: ich unterrichte neu AFFINITY Designer Kurs bei DIGICOMP SCHWEIZ
Im Oktober 2014 wurde die App Affinity Designer im Mac-App-Store veröffentlicht. Im Juni 2015 bekam Serif für die App den Apple Design Award verliehen. Im Juli 2015 begannen die Arbeiten an Affinity Photo. 2016 wurden beide Apps mit der Version 1.5 auch für Windows veröffentlicht. Am 19. Juni 2019 erschien die DTP-Software Affinity Publisher.
1. Tutorial wie man in AFFINITY Designer Linien und Konturen zeichnet
-Tutorial in Englisch mit deutschen Untertiteln von Affinity: AFFINITY DESIGNER
-Adobe Illustrator Anleitung: Wie man mit Adobe Illustrator zeichnet
-Alle Adobe Tipps als: i-adobe eBook in Deutsch
