How to quickly change brush sizes in Photoshop

With courtesy of Illustrationsource in New York City - www.illustrationsource.com

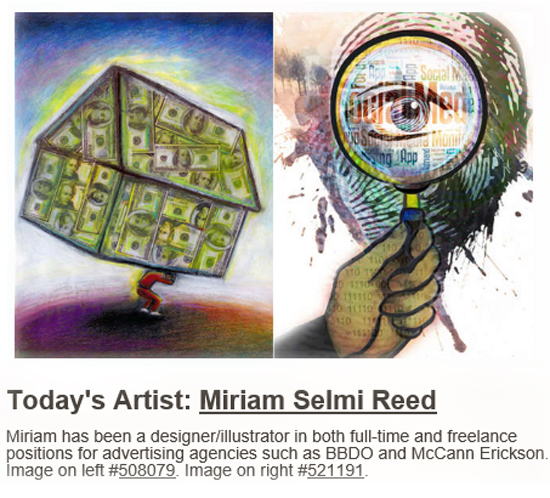
With courtesy of Illustrationsource in New York City – http://www.illustrationsource.com

Miriam Selmi Reed is represented by Illustration Source, New York City. Portfolio and contact: Illustration Source NYC

divider

TIP OF THE WEEK:
“How I quickly change my brush sizes in Photoshop”
With a painting tool selected, Control + Option (Mac) – drag left/right in order to decrease/ increase brush size. Control + Option (Mac) – drag up/down to decrease/ increase brush hardness. Since I’m using a German keyboard; I have to press the ctrl & alt keys on my Mac…

On Windows: Alt + Right Mouse – drag left/right to decrease/increase brush size and up/down to decrease/ increase brush hardness.

brush

TIPP DER WOCHE:
“So verändere ich meine Pinselgrössen in Photoshop super schnell”
Wählen Sie Ihr Pinselwerkzeug, drücken Sie auf die ctrl & alt Tasten (Mac) – klicken & ziehen Sie nach links/rechts um die Pinselgrösse zu verkleinern/vergrössern. Ctrl + alt (Mac) – klicken & ziehen Sie nach oben/unten um die Härte zu reduzieren/verstärken.

Bei Windows: Alt Taste + rechter Mausklick – klicken & ziehen Sie nach links/rechts um den Pinsel zu verkleinern/vergrössern und nach oben/unten um die Härte zu reduzieren/verstärken.

divider

Miriam Selmi Reed is represented and licensed by Illustration Source - Courtesy of Illustration Source

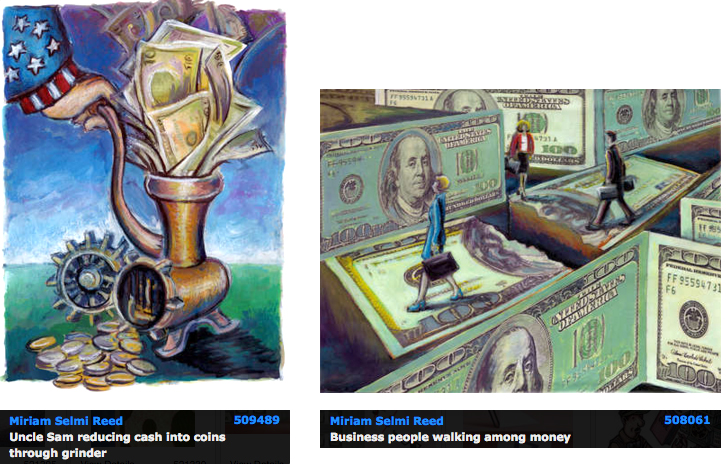
Miriam Selmi Reed is represented and licensed by Illustration Source – Courtesy of Illustration Source

View the artists’s homage on the topic: TAX TIME

Miriam Selmi Reed is represented by Illustration Source, New York City. Portfolio and contact: Illustration Source NYC

Illustration technique: watercolor, acrylic and pencil combined with digital mixed media using Adobe Photoshop and Illustrator.Copyright by Illustration Source, New York City.

Illustrations-Technik: Aquarell, Acryl mit Farbstift, gemischt mit Adobe Photoshop und Illustrator. Copyright by Illustration Source, New York City.

divider

Your source for commissioned illustration: ORIGINAL ART STUDIOS in New York City.

OAS

Portfolio Original Art Studios, New York City: MIRIAM SELMI REED

Advertisement

InDesign: Make your own Short-cuts / Eigene Kurzbefehle erstellen

Tutorial in English and German / Anleitung in Deutsch und Englisch

Deutsche Version siehe unten!
divider
English version:

Would you like to receive our tips for free in your e-mail box? Simply select FOLLOW to sign up with your e-mail address.

TIP OF THE WEEK: How to make your own short cuts in Adobe InDesign

MENU > EDIT > open the KEYBOARD-SHORTCUTS

First you have to create a NEW SET and choose a name
newset

Under PRODUCT AREA choose the shortcut you’d like to change:

1. In our case I’ve chosen under VIEW-MENU > GRIDS & GUIDES: Show Baseline Grid.

assign

2. Under CURRENT SHORTCUTS remove the old shortcut.

3. Create a NEW SHORTCUT and hit ASSIGN.
In our case I’ve selected on my Mac for Show/Hide Baseline Grid: ALT (Option) + SHIFT + H
It is important to create a shortcut which is not in use!

4. Confirm with OK

Try your own shortcut in InDesign – have fun 🙂

divider

Trailers and tutorials take lots of time. Of course it is free, but maybe you’d like to buy us “a cup of coffee?” Any support is greatly appreciated: PayPal Donate Button

divider

Deutsche Version:

Möchten Sie unsere gratis Tipps in Ihrem e-mail erhalten? Schreiben Sie sich unter FOLLOW mit Ihrer e-mail Adresse ein.

Tipp der Woche: wie man selber eigene Kurzbefehle in InDesign erstellen kann!

MENU > BEARBEITEN > TASTATURBEFEHLE

Das Bedienfeld öffnet sich!

Zuerst muss man einen NEUEN SATZ erstellen und nach Wunsch benennen.

Tastatur1

Unter PRODUKTEBEREICH den Tastaturbefehl suchen den man ändern will.

1. In unserem Fall unter ANSICHT-MENÜ > GRUNDLINIENRASTER EINBLENDEN.

Tastatur2

2. Unter AKTUELLE TASTATURBEFEHLE zuerst den alten Tastaturbefehl ENTFERNEN.

3. Unter NEUER TASTATURBEFEHL einen neuen (unbenutzten*) Tastaturbefehl ZUWEISEN.
In unserem Fall wählte ich auf meinem PC für den Grundlinienraster einblenden: z.B. UMSCHALT (SHIFT) + CTRL (PC) / Cmnd (Mac) + H

4. mit OK bestätigen

Wichtig ist, dass man logischerweise einen neuen KURZBEFEHL auswählt, der noch unbenutzt* ist!

Den neuen eigenen Kurzbefehl in InDesign ausprobieren – viel Spass!

divider

Adobe-Tipps zusammenzustellen braucht viel Zeit. Natürlich ist es gratis, aber vielleicht spendieren Sie uns einen “Kaffee?” Jede Unterstützung freut uns. Danke! PayPal Donate Button