English version:
Would you like to receive our tips for free in your e-mail box? Simply select FOLLOW to sign up with your e-mail address.
![]()
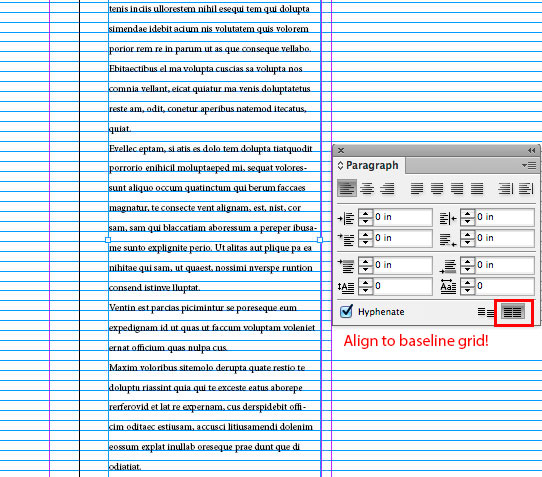
TIP OF THE WEEK: Align your text to your baseline grid!
The Baseline Grid in Adobe InDesign is perfect to align your text!
Here are the 4 easy steps to align your text to the Baseline Grid and alter the grid in your InDesign > Preferences:
Step 1: Open a document in InDesign and choose your presets; under Margins select you border from the Top as you wish:

Step 2: Select the Type Tool, draw a text frame and fill it with Placeholder Text. Select your font type as well as your Leading. Go to View > Grids & Guides > Show Baseline Grid.

Step 3: Select your text with the type tool and go to Window > Type & Tables > Paragraph. There you select the function Align to Baseline Grid.
You’ll find the same option when you create a new Paragraph Style.
Step 4: Go to your InDesign Preferences and select Grids: the settings are the same as you’ve chosen previously. Under Start, you select the same Margins from the Top and under Increment Every the same Leading you’ve already chosen for your text. For PC the Preferences can be found under Edit > Preferences / Mac: InDesign > Preferences.

As soon as you click OK, your Baseline Grid will automatically adjust to your leading!
![]()
Our new i-adobe book is available online – in English – including tutorials on 72 pages – Preview & download here!

i-Adobe interactive book / Cover illustration: Michael Alan Reed
![]()
