Tutorial in English and German / Anleitung in Deutsch und Englisch
Deutsche Version siehe unten!
![]()
English version:
Tip of the week: Here’s how to make a Tiff with a transparent background, which allows you to place it into InDesign.
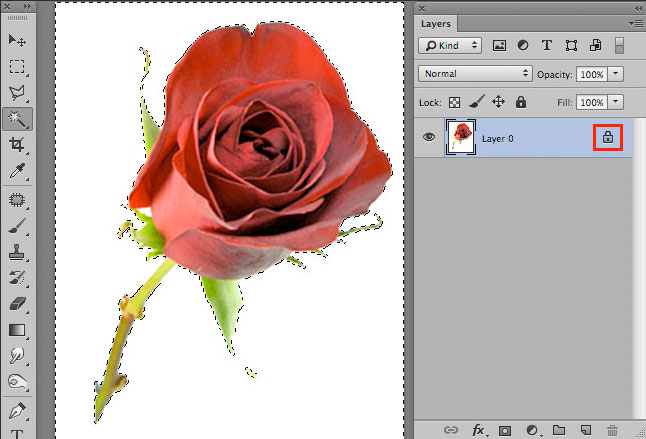
Step 1:
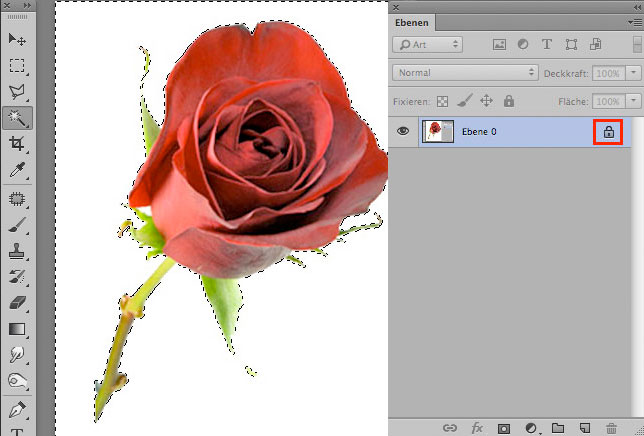
Open your file in Photoshop and double-click on the lock changing the background layer to Layer 0.
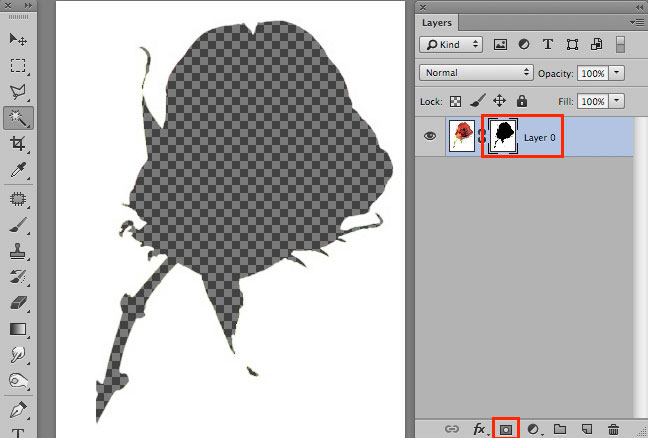
Step 2:
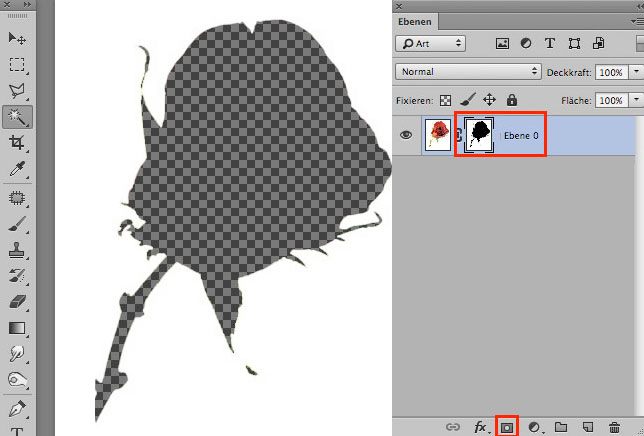
Make your selection and click on the Layer Mask icon.
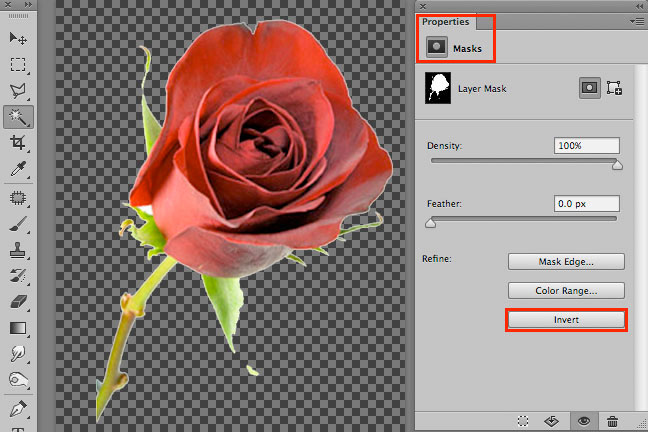
Step 3:
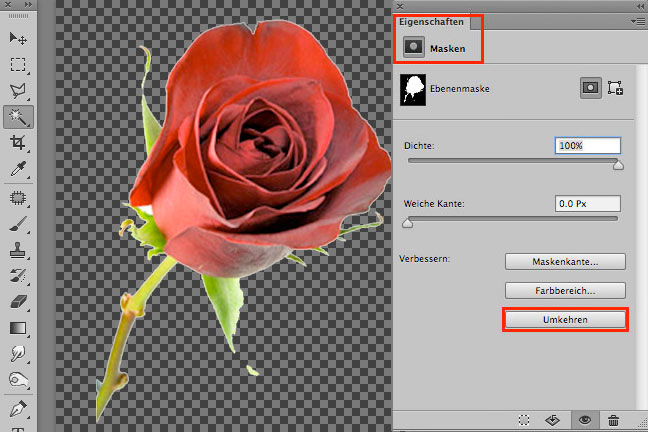
In case you need to invert the selection: click on the Layer Mask so the Properties window opens. There you click on the option Invert.
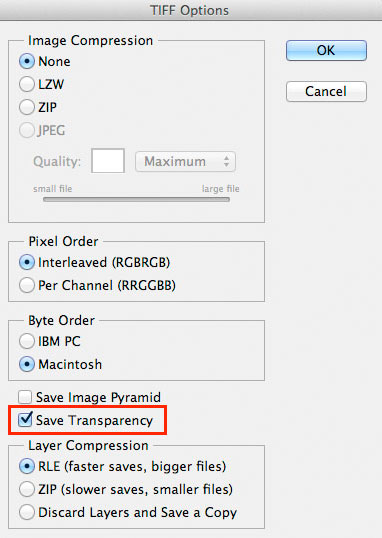
Step 4:
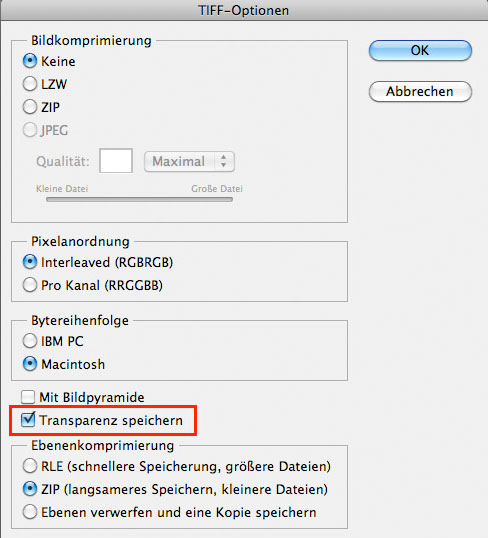
Now comes the crucial step: Save the file as a Tiff with all the layers and in the Tiff Options window click on the box save Save Transparency.
Now open InDesign and place the Tiff File as an image with a transparent background!
![]()
Deutsche Version
Tipp der Woche: Wie man bei einem Tiff den Hintergrund transparent macht und es ins InDesign platzieren kann.
Schritt 1:
Öffnen Sie Ihr Photoshop Bild und doppelklicken Sie auf das Schloss, damit wird es Ebene 0.
Schritt 2:
Machen Sie Ihre Auswahl und klicken Sie auf das Ebenenmasken-Symbol.
Schritt 3:
In manchen Fällen müssen Sie Ihre Auswahl umkehren: klicken Sie auf die Ebenenmaske, damit öffnen sich die Eigenschaften. Dort wählen Sie die Box Umkehren.
Schritt 4:
Jetzt kommt der wichtigste Punkt: Sichern Sie ihr Tiff mit allen Ebenen und bei den Tiff-Optionen klicken Sie auf die Box Transparenz speichern.
Jetzt können Sie ihr Tiff Bild ins InDesign mit transparentem Hintergrund platzieren!
