3D

3D is on the way… Here are a couple of cool easy 3D programs to check out.
Deutsch: 3D ist auf dem Weg… Unten findest du ein paar coole und einfache 3D Programme zum anschauen. Free 3D program for Mac and Windows: BLENDER

Cool and easy way to animate your drawings with GREASE PENCIL 2.8 – have a look:
Deutsch: Wie du deine Zeichnungen mit GREASE PENCIL 2.8 animieren kannst:

Another 3D program called SKETCH UP is not for free but easy to use and therefore interesting to check out: Info on The 3D Program SKETCH UP
Film: SKETCH UP TUTORIAL
Deutsch: Ein anderes 3D Programm mit dem Namen SKETCH UP ist zwar nicht gratis aber total einfach zum lernen. Der Film-Link oben zeigt ein Tutorial.

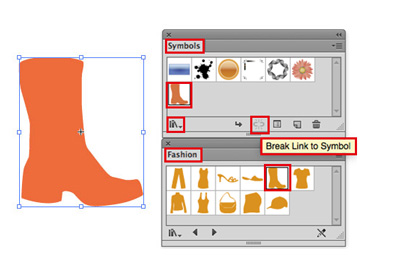
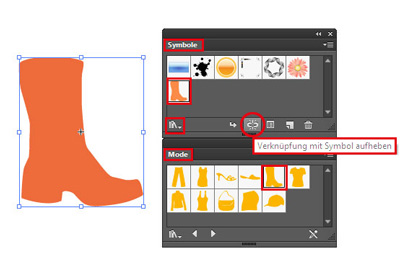
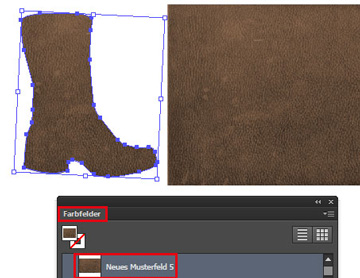
Since you might have ADOBE CREATIVE CLOUD, you might know about the Perspective Tool in Adobe Illustrator.
Information: Perspective in Adobe Illustrator
Deutsch: Da du vermutlich die ADOBE CREATIVE CLOUD hast, kennst du vermutlich das Perspektiven Werkzeug von Adobe Illustrator.

copyright by Miriam Selmi Reed – REEDesign.ch

Our 3D and animation infos will be continued soon – stay tuned!

Our eBook with great tips about Indesign, Photoshop & Illustrator in English: eBook in English – Adobe Tips & Tricks
Unser eBook mit Tipps über Indesign, Photoshop & Illustrator in Deutsch: eBook in Deutsch – Adobe Tipps & Tricks

Advertisement

Illustrator Workshop: Symbols 2

Tutorial in English and German / Anleitung in Deutsch und Englisch

Deutsche Version siehe unten!
divider

English:
How I form the photo pattern in Adobe Illustrator: I go under MENU > OBJECT > ENVELOPE DISTORT > ENVELOPE OPTIONS and choose “Distort Pattern Fills”.

5E

Then I go to MENU > ENVELOPE DISTORT > MAKE WITH MESH and select the Rows and Columns I want.

6E

Then I choose the Direct Selection Tool (White Arrow) and move the points until I get the shape I want!

7

divider

MORE INFO’S: HOW TO CREATE YOUR OWN PATTERN

MEHR INFO’S: WIE MAN EIN EIGENES MUSTER ERSTELLT

divider

Deutsch:
Wie ich das Muster in Adobe Illustrator verziehe und forme: Ich gehe unter MENÜ > OBJEKT > HÜLLEN > HÜLLEN-OPTIONEN und wähle “Musterfüllungen verzerren” .

5

Dann gehe ich zu MENÜ > OBJEKT > GITTER > HÜLLENGITTER und wähle meine Zeilen und Spalten.

6

Dann nehme ich das Direkt-Auswahl-Werkzeug (Weisser Pfeil) und ziehe an den Punkten bis ich mein gewünschtes Resultat erreicht habe!
7

Illustrator Workshop: Symbols 1

Tutorial in English and German / Anleitung in Deutsch und Englisch

Deutsche Version siehe unten!
divider

English Version:
How I use Symbols in Adobe Illustrator: I go under MENU > WINDOW > SYMBOLS and choose a Fashion Symbol which you can find in the Symbol-Library. Very important: to click on the icon “Break Link to Symbol”.

1E

Then I place a leather-photo (tiff or jpg) and select Embed on top.

2E

I select the leather photo and drag it into my Illustrator Swatch Box to create a New Pattern Swatch. (Menu > Window > Swatches)
4E

Then I select my Symbol (Boot) and click on the leather pattern to fill.
Next time I will show how to form the leather pattern inside the boot to make it more 3D!

divider

Our new i-adobe Ebook is available here – in English – including films on 72 pages:
EASY DOWNLOAD

Unser neues i-adobe book ist hier erhältlich – in Deutsch – inklusive Filme auf 72 Seiten: SICHERER DOWNLOAD

divider

Deutsche Version:
Wie ich Symbole in Adobe Illustrator benutze: Ich gehe unter MENÜ > FENSTER > SYMBOLE und wähle ein Mode-Symbol welche man in den Symbol-Bibliotheken finden kann. Sehr wichtig: auf das icon klicken “Verknüpfung mit Symbol aufheben”.

1

Dann platziere ich ein Leder-Foto (tiff oder jpg) und klicke oben in der Steuerung auf Einbetten .

2

Ich wähle das Leder-Foto an und ziehe es in meine Illustrator Farbfelder um ein neues Musterfeld zu erstellen. (Menü > Fenster > Farbfelder)
4

Dann wähle ich mein Symbol (Stiefel) und fülle es mit meinem neuen Ledermuster indem ich auf das neue Musterfeld klicke. Nächstes Mal werde ich zeigen wie ich das Ledermuster um den Stiefel forme damit es mehr 3D wirkt.

Graphic Styles / Grafikstile in Adobe Illustrator

Tutorial in English and German / Anleitung in Deutsch und Englisch

Deutsche Version siehe unten!
divider

English version:

Would you like to receive our tips for free in your e-mail box? Simply select FOLLOW to sign up with your e-mail address.

TIP OF THE WEEK: Graphic Styles in Illustrator CS6

1. Open a new document in Adobe Illustrator and draw a simple shape with a fill color.

2. Select your shape with the Selection Tool and go to Window > Graphic styles. Select the drop-down-arrow of the Libraries and choose your favorite Graphic Style.
In our example, we are using the 3D Effect Library.

graphicstyle

Each time you select a Graphic Style in one of the protected Adobe Libraries, it will be added on to your personal Graphic Style collection and can be altered as you wish.
Under Window > Appearance you may change the Graphic Style or delete it.

There are lots of Graphic Styles in the Adobe Library you should try out – have fun!

divider

Deutsche Version:

Möchten Sie unsere gratis Tipps im e-mail erhalten? Schreiben Sie sich unter FOLLOW mit Ihrer e-mail Adresse ein.

TIPP DER WOCHE: Grafikstile in Illustrator CS6

1. Öffnen Sie ein neues Dokument in Adobe Illustrator, zeichnen Sie eine einfache Form und färben Sie diese mit einer Flächen-Farbe ein.

2. Wählen Sie die Form mit dem Auswahl-Werkzeug an und gehen Sie zu Fenster > Grafikstile. Wählen Sie einen Grafikstil nach Wunsch unter den Bibliotheken an.
Hier zeigen wir ein Beispiel aus der 3D-Effekte Bibliothek.

Grafikstil

Jedesmal wenn man einen Grafikstil von den schreibgeschützen Adobe Bibliotheken anwählt, wird dieser zu den eigenen Grafikstilen dazugefügt und kann somit verändert werden.
Unter Fenster > Aussehen kann man jeden Grafikstil verändern oder löschen.

Es gibt viele Grafikstile in den Adobe Bibliotheken die man ausprobieren sollte – viel Spass!