Colors / Farben in Adobe Photoshop

As instructors of Adobe programs and creative professionals, we’ve assembled this blog as easy reference for our students and clients.” Miriam Selmi Reed & Michael Alan Reed

English version:
TIP: a non-destructive way of colouring part of an an image with a fill/adjustment mask:
1. Open your image in Adobe Photoshop.
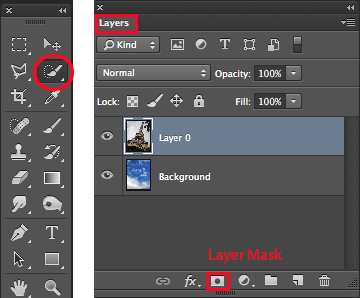
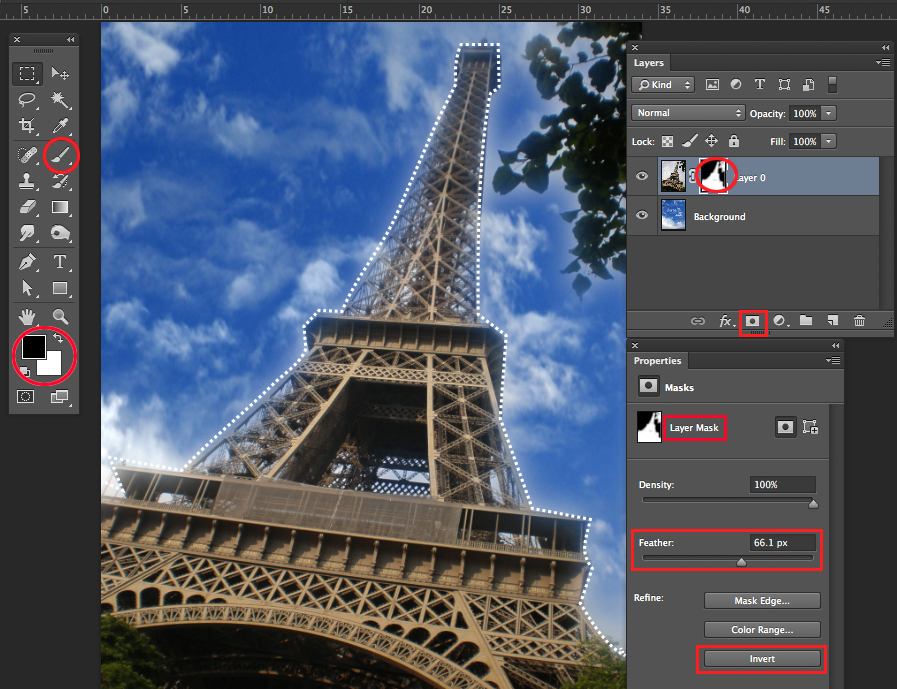
2. Select your layer and make a selection with your Quick Selection Tool.
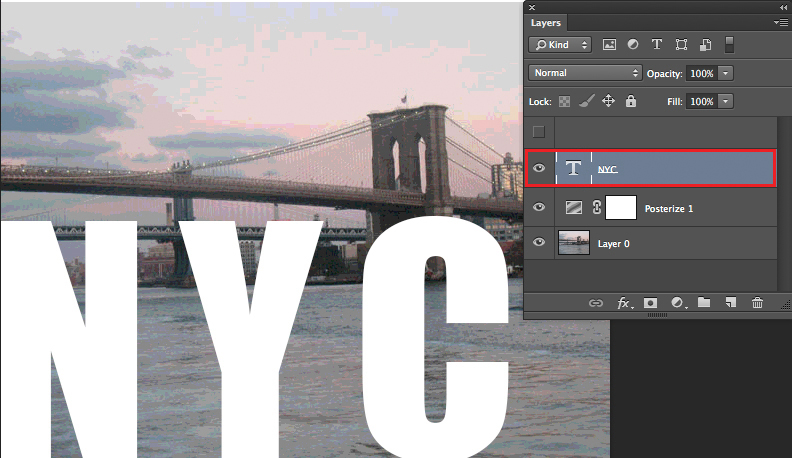
3. Click on to the fill/adjustment icon in your layers panel to see all your choices of color corrections or open under Menu > the Adjustments panel.
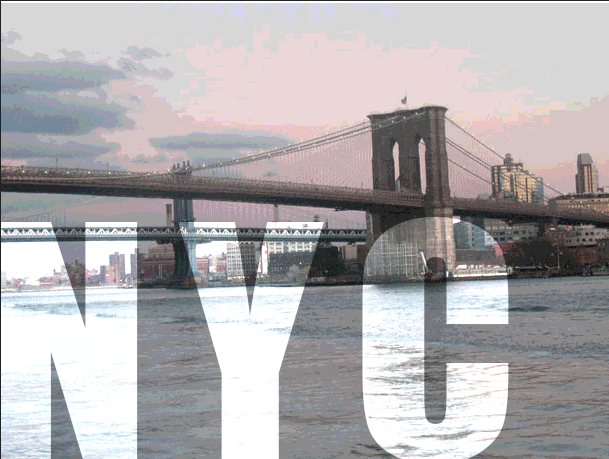
4. in my case I’ve selected Black & White: part of the image is now shown in grayscale.
5. With a double-click on the mask, the Properties will open, so I can click INVERT if needed.
(You may find them also under the Menu > Window > Properties.)

Information: How to make a quick selection of an image using the Quick-Selection-Tool

Sharing infos: iADOBE FORUM Our tips for easy download: i-adobe eBook in English

Deutsche Version:
TIPP: wie man Teil eines Bildes mit Einstellungsebenen nicht-destruktiv einfärben kann:
1. Öffne dein Bild in Adobe Photoshop.
2. Wähle deine Ebene und erstelle mit dem Schnellauswahlwerkzeug eine Auswahl.
3. Klicke auf das Einstellungsebenen-Icon unten im Ebenen-Bedienfeld, damit du alle Farbkorrekturen sehen kannst, oder öffne unter FENSTER > das Korrekturen-Bedienfeld.
4. In meinem Fall wählte ich Schwarz & Weiss: damit erscheint Teil des Bildes nun Grau.
5. Mit einem Doppelklick auf die Maske, öffnen sich die Eigenschaften und ich klicke auf UMKEHREN. (Diese findet man auch unter dem Menu > Fenster > Eigenschaften.)

Information: Wie man Teil eines Bildes schnell auswählt > Schnell-Auswahl-Werkzeug

Tipp! Adobe Photoshop – Die komplette Übersetzung Englisch > Deutsch in Photoshop CC

Tausche dich aus im iADOBE FORUMAlle unsere Tipps als: i-adobe eBook in Deutsch

Advertisement

Ebenenmasken: Bilder einfach freistellen / Layer Masks: removing Backgrounds the Easy Way

Tutorial in English / Deutsch:

Deutsche Version siehe unten!
divider

English Version:

Simply open a Photoshop file with two images. The image you’d like to remove – a sky for example – is on the top layer.
The new Sky you prefer is on the bottom layer. What you’ll do next is simple and easy:
You delete your old sky on the top layer with a Layer Mask.

1. Make a selection of your sky or image part you’d like to remove on the top layer, using your favorite selection tool.
For example: The Quick Selection Tool in combination with “Refine Edge”.

2. Once your old sky on the top layer is selected, simply click on the “Layer Mask” icon.
Part of your image on the top will be covered by a Layer Mask and the new image on the layer below will show up instead.
layermask

3. By double-clicking the Layer Mask icon on the top layer, the “Layer-Mask-Properties” will open. There you’ll be able to invert the Layer Mask or feather the edges.

layermask2

Tip 1: With the Brush Tool you can easily make changes to your Layer Mask: Simply select the Layer Mask and paint with the Brush Tool using either Black or White directly inside the Layer Mask, until you’re happy with the result!

Tip 2: How to remove parts of your image and save it with a transparent background: Tiff with a transparent background

divider
Deutsche Version:

Öffnen Sie Ihr Photoshop Dokument mit zwei Bildern. Das Sujet welches Sie löschen wollen – zum Beispiel ein Himmel – ist auf der oberen Ebene.
Der neue Himmel den Sie behalten wollen, ist auf der unteren Ebene. Was Sie als nächstes machen ist ganz einfach:
Sie löschen Ihren alten Himmel auf der oberen Ebene mit einer Ebenenmaske.

1. Wählen Sie Ihren Himmel oder Bildteil auf der oberen Ebene, den Sie löschen wollen, mit einem der Auswahlwerkzeuge an.
Zum Beispiel: Das Schnellauswahlwerkzeug zusammen mit der Option “Kante verbessern”.

2. Sobald Sie Ihren Himmel oder Bildteil angewählt haben den Sie löschen wollen, klicken Sie im Ebenenbedienfeld auf das “Ebenenmaske” icon. Sofort wird nun ein Bildteil gelöscht, respektive mit einer Maske abgedeckt und das untere Bild auf der unteren Ebene mit dem neuen Himmel kommt zum vorschein.
Ebenenmaske

3. Wenn Sie mit einem Doppelklick auf das Ebenenmaske-Symbol klicken, öffnen sich die “Ebenenmasken-Eigenschaften”.
Damit können Sie die Maske umkehren oder eine weiche Kante geben.

Ebenenmaske2

Tipp 1: Mit dem Pinsel-Werkzeug können Sie einfach und schnell Änderungen an Ihrer Ebenenmaske vornehmen: Wählen Sie die Ebenenmaske an und malen mit dem Pinselwerkzeug, sowie Schwarz oder Weiss direkt in die Ebenenmaske, bis Sie mit Ihrem Resultat zufrieden sind!

Tipp 2: Wie man ein Bild freistellt – mit einem transparenten Hintergrund: Tiff mit einem transparenten Hintergrund

Photoshop CS6: Clipping mask and adjustment layer option

English version:

Would you like to receive our tips for free in your e-mail box? Simply select FOLLOW to sign up with your e-mail address.

TIP OF THE WEEK: Clipping mask in Adobe Photoshop CS6

divider

Step 1: Open your image in Photoshop CS 6 and add on “Posterize” in your adjustment layer.
1

Step 2: add on some bold, large Text.
2

Step 3: Duplicate your image, move that layer on top and select “Create Clipping Mask”.
To adjust the effect, we selected “Pin Light” from the layer blending mode.
3

and here is the result:
4