As instructors of Adobe programs and creative professionals, we’ve assembled this blog as easy reference for our students and clients.” Miriam Selmi Reed & Michael Alan Reed
English version
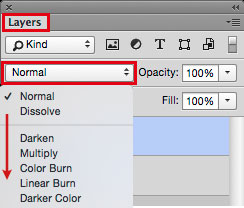
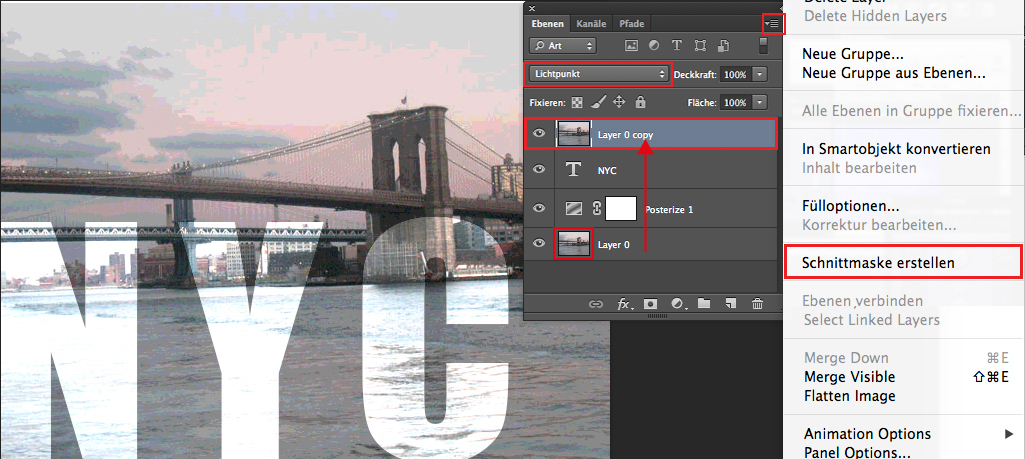
In my illustration below, I’ve used clipping masks and the adjustment layer “Posterize” in Adobe Photoshop: Step-by-step quick guide. ALL tips for easy download: i-adobe eBook in English
Deutsche Version
Bei meiner Illustration unten benutzte ich Schnittmasken und “Tontrennung” bei meinen Einstellungsebenen : Schritt-für-Schritt Anleitung. Alle Tipps zum herunterladen: i-adobe eBook in Deutsch
![]()

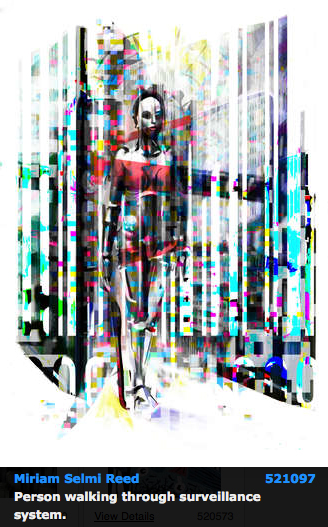
Courtesy of Illustration Source
View the artists’s homage on the topic SOCIAL MEDIA: Portfolio Illustration Source
![]()
Your source for commissioned illustration: ORIGINAL ART STUDIOS in New York City.

Portfolio Original Art Studios, New York City: MIRIAM SELMI REED