Desktop Publisher Lehrgang

Hallo zusammen
Freue mich sehr, dass unser nächster DTP Lehrgang auf “garantierte Durchführung” gesetzt wurde. Beginn nächste Woche: 24. Oktober 2020, SA Morgen von 9:00 – 12:50 Uhr.

Wir haben noch ein paar Plätze frei, weitere wichtige Informationen dazu findest du hier:
Desktop Publishing Lehrgang Klubschule Zürich

Hier ein Film mit ehemaligen DTP Absolventen zur Inspiration:

Was kann man nach einem Desktop Publisher Lehrgang vorweisen?

Würde mich sehr freuen dich im neuen DTP Lehrgang begrüssen zu dürfen!
Herzliche Grüsse,
Miriam Selmi Reed

Advertisement

SMART !


PDF zum downloaden vom Publisher

divider

Ich arbeite seit vielen Jahren mit Smart Objekten. Unten zeige ich euch zwei Illustrationen die ich mit AFFINITY Designer gezeichnet habe. Das Coole an AFFINITY Designer ist, dass ich im selben Programm von der Pixel-Persona in die Vektor-Persona wechseln kann.

I’ve been using Smart Objects for many years. Below you’ll find two of my new Illustrations created with AFFINITY Designer. The benefit of AFFINITY Designer: I can switch from the Pixel-Persona to the Vector-Persona in the same program. Tutorials: AFFINITY

Shown with Courtesy of Illustration Source, New York City, USA

View Miriam Selmi Reed’s homage on the topic: CURRENT EVENTS

Miriam Selmi Reed
 is represented by Illustration Source, New York City.
Portfolio and contact:  Illustration Source NYC

HAPPY 2020! Schnittmasken / Clipping masks in Photoshop

As instructors of Adobe programs and creative professionals, we’ve assembled this blog as easy reference for our students and clients.” Miriam Selmi Reed & Michael Alan Reed

English version
In my illustration below, I’ve used clipping masks and the adjustment layer “Posterize” in Adobe Photoshop: Step-by-step quick guide. ALL tips for easy download: i-adobe eBook in English

Deutsche Version
Bei meiner Illustration unten benutzte ich Schnittmasken und “Tontrennung” bei meinen Einstellungsebenen : Schritt-für-Schritt Anleitung. Alle Tipps zum herunterladen: i-adobe eBook in Deutsch

divider

Courtesy of Illustration Source

View the artists’s homage on the topic SOCIAL MEDIA: Portfolio Illustration Source

divider

Your source for commissioned illustration: ORIGINAL ART STUDIOS in New York City.

OAS

Portfolio Original Art Studios, New York City: MIRIAM SELMI REED

Motion & Animation 1

Moving images are the future / bewegte Bilder sind die Zukunft!
This is the beginning of my series about Animation, Stop Motion & Film editing. Never before was it so easy to create your own movies.
Dies ist der Anfang von meiner Serie über Animation, Stop Motion & Film schneiden. Noch nie war es so einfach wie heute deinen eigenen Film zu drehen.

Let’s go !

English:
PART 1, HOW TO CREATE AN ANIMATED GIF WITH ADOBE PHOTOSHOP:
Tutorial: How to create an animated GIF in Adobe Photoshop

Sharing infos: iADOBE FORUM Our tips for easy download: i-adobe eBook in English

Illustrated with Illustrator and animated with Photoshop for Z-DOG.org

Deutsch:
TEIL 1, WIE MAN EIN ANIMIERTES GIF MIT ADOBE PHOTOSHOP MACHT:
Tutorial: Wie man ein Portrait animiert

Tausche dich aus im iADOBE FORUMAlle unsere Tipps als: i-adobe eBook in Deutsch

Happy 2019 !

Illustration & animation by Michael Alan Reed – www.REEDesign.ch

Michael Alan Reed used Adobe Illustrator for his illustration, Photoshop with a “Lense-Flare-Effect” in the timeline to animate it and export as a GIF file. For (online) lessons in German or English feel free to contact us. HAPPY 2019 !

Here is how we animate / Hier findest du unsere Animation-Tipps auch in Deutsch:
Animate with: Adobe After Effects
Animate with: Adobe Photoshop

Actions / Aktionen – Adobe Photoshop

As instructors of Adobe programs and creative professionals, we’ve assembled this blog as easy reference for our students and clients.” Miriam Selmi Reed & Michael Alan Reed

English version:
Below is my personal way of working with ACTIONS as I like to repeat the same options in all my Photoshop images:
1. Open your image in Adobe Photoshop and select ACTIONS under WINDOW.
2. Create a NEW ACTION and select the RECORD button.
3. Make the changes you desire and work carefully as each step is being recorded.
4. Once you are done: Hit the STOP Button on the ACTION window.
5. Now open a new document, hit the PLAY button: the changes will be executed automatically!

Another way how to adjust several images quickly, here is a great tutorial from Adobe: How to edit multiple photos.

Sharing infos: iADOBE FORUM Our tips for easy download: i-adobe eBook in English

Illustration by Miriam Selmi Reed – Courtesy of Illustration Source NYC

Deutsche Version:
Oben zeige ich mein persönlicher Tipp wie ich mit AKTIONEN arbeite, wenn ich dieselbe Optionen bei allen Bilder genau gleich einstellen will:
1. Öffne dein Bild in Adobe Photoshop und öffne das AKTIONEN-Bedienfeld unter FENSTER.
2. Erstelle eine AKTION und wähle AUFZEICHNUNG BEGINNEN.
3. Arbeite in ruhigem Tempo weiter und mache deine gewünschten Änderungen.
4. Klick auf den AUFZEICHNUNG BEENDEN Knopf beim AKTIONEN Bedienfeld.
5. Jetzt kannst du ein neues Dokument öffnen, den AUSWAHL AUSFÜHREN Knopf klicken: deine Änderungen werden sofort automatisch ausgeführt!

Hier eine andere Art wie man mehrere Fotos gleichzeitig verändert, ein Lerntutorial direkt von Adobe: Wie man Korrekturen bei einer Foto-Serie ausführen kann.

Tipp! Adobe Photoshop – Die komplette Übersetzung Englisch > Deutsch in Photoshop CC

Tausche dich aus im iADOBE FORUMAlle unsere Tipps als: i-adobe eBook in Deutsch

divider

Courtesy of Illustration Source NYC

CONCEPT DEBT: Editorial illustrations SIS New York City

divider

Miriam Selmi Reed is represented by Illustration Source, New York City. Portfolio and contact: Illustration Source NYC

Portfolio Original Art Studios, New York City: MIRIAM SELMI REED

CONCEPT ART – Featured Artist Michael Ohm

Information in English and German / Anleitung in Deutsch und Englisch
Deutsche Version siehe unten!

English version:

Copyright by Michael Ohm

I’d like to present a former art student of mine, Michael Ohm. His talent was unsurpassed in digital illustration and he is working now as a freelance concept artist. Michael works under the label EVIL SPY DESIGN and loves to create artwork for Science Fiction and Fantasy. Michael is happy to share his knowledge with us on how he uses the technique called “photobashing”. With this method, the details and color palette will remain intact.

Michael would like to explain his favourite technique PHOTOBASHING:

This technique is great to achieve solutions in a quick way. With this method Michael puts different images on top of each other, adjusts the transparencies, changes the colors and uses filters.
Then he uses these collages in 2 ways:
1. : To achieve a color palette and add details of his own images.
2. : Or he searches in the Collage for forms such as patterns he can use. Like patterns in a cloud for example.
He strongly suggests to use your own images to avoid copyright issues. By using Photobashing he doesn’t use whole objects such as cars, helicopters or people, its more about the colors and textures or details. For example the lamp of a tank or the window of an airplane.

Here is a Tutorial from Adobe: Image Compositing

Thanks a lot for sharing Michael Ohm and lots of luck with your cool CONCEPT ART
His artwork can be seen at: EVIL SPY DESIGN

divider

Deutsche Version:

Ich möchte euch ein ehemaliger Design-Student präsentieren; Michael Ohm. Sein Talent für digitale Illustrationen ist mir bereits vor Jahren in der Klasse aufgefallen und Michael arbeitet inzwischen als Freelance Concept Artist unter dem Label EVIL SPY DESIGN wo er gerne in den Bereichen Science Fiction und Fantasy arbeitet. Michael möchte uns erklären wie er mit der Technik “Photobashing” die Details und Farbpalette erhalten konnte.

Michael möchte euch die Technik PHOTOBASHING vorstellen:

Diese Technik eignet sich hervorragend um rasch brauchbare Ergebnisse zu erzielen. Hierbei werden diverse Bilder, ohne spezielle Anordnung übereinander gelegt, die Transparenzen angepasst und nach Wunsch Farbe verändert und Filter angewendet.
Nutzen lassen sich dann diese Collagen auf zwei Arten.
1. : Um eine Farbpalette zu erhalten und diverse Details in seinem eigenem Bild einzubringen.
2. : Um in den Collagen selbst Formen zu erkennen auf denen man aufbauen kann. Wie bei Mustern in Wolken erkennen.
Es empfiehlt sich bei dieser Technik eigene Fotos/Bilder zu verwenden um Probleme mit Urheberrechten zu vermeiden. Es geht beim Photobashing nicht darum das ganze Element wie z.B Autos, Helikopter, Eiffelturm oder Menschen für sich zu nutzen, sondern lediglich Farben, Textur oder kleine Details. Zum Beispiel die Lampe eines Panzers oder die Scheibe eines Flugzeuges.

Hier ist ein Tutorial direkt von Adobe, mit deutschen Untertiteln: Bild-Komposition

Vielen Dank lieber Michael Ohm und viel Glück weiterhin mit deinen coolen Illustrationen!
Michael Ohm’s Artwork kann man hier anschauen: EVIL SPY DESIGN

Layer Masks / Bilder freistellen

Tutorial in English and German / Anleitung in Deutsch und Englisch

Deutsche Version siehe unten!
divider

English version:
Tip of the week: Here’s how to make a Tiff with a transparent background, which allows you to place it into InDesign.

Here is a Tutorial from Adobe: Easily and accurately select image areas

And here are my step-by-step directions:

Step 1:
Open your file in Photoshop and click on the lock changing the background layer to Layer 0.
Tiff_Options4

Step 2:
Make your selection and click on the Layer Mask icon.
Tiff_Options3

Step 3:
In case you need to invert the selection: click on the Layer Mask so the Properties window opens. There you click on the option Invert.
Tiff_Options2

Step 4:
Now comes the crucial step: Save the file as a Tiff with all the layers and in the Tiff Options window click on the box save Save Transparency.
TiffOptions

Now open InDesign and place the Tiff File as an image with a transparent background!
Sharing infos: iADOBE FORUM Our tips for easy download: i-adobe eBook in English

divider

Deutsche Version
Tipp der Woche: Wie man bei einem Tiff den Hintergrund transparent macht und es ins InDesign platzieren kann.

Hier ist ein Tutorial direkt von Adobe: Bildbereiche präzise auswählen

Hier ist meine Schritt-für-Schritt Anleitung:

Schritt 1:
Öffnen Sie Ihr Photoshop Bild und doppelklicken Sie auf das Schloss, damit wird es Ebene 0.
Tiff_Optionen4

Schritt 2:
Machen Sie Ihre Auswahl und klicken Sie auf das Ebenenmasken-Symbol.
Tiff_Optionen3

Schritt 3:
In manchen Fällen müssen Sie Ihre Auswahl umkehren: klicken Sie auf die Ebenenmaske, damit öffnen sich die Eigenschaften. Dort wählen Sie die Box Umkehren.
Tiff_Optionen2

Schritt 4:
Jetzt kommt der wichtigste Punkt: Sichern Sie ihr Tiff mit allen Ebenen und bei den Tiff-Optionen klicken Sie auf die Box Transparenz speichern.
TiffOptionen

Jetzt können Sie ihr Tiff Bild ins InDesign mit transparentem Hintergrund platzieren!
Tausche dich aus im iADOBE FORUMAlle unsere Tipps als: i-adobe eBook in Deutsch

Photoshop: Blending Mode / Mischmodus!

English version:
Adobe Photoshop Tip > BLENDING MODE: I love to use Blending Modes in my layers, as shown in the Illustration below. I first go under MENU > LAYERS > and select a different Blending Mode for the layer. With this method, I can apply different transparencies to my layers and work non-destructive.

Blendingmode

Sharing infos: iADOBE FORUM Our tips for easy download: i-adobe eBook in English

Illustration by Miriam Selmi Reed – Courtesy of Illustration Source

divider

Deutsche Version:
Adobe Photoshop Tipp > MISCHMODUS: Ich benutze gerne den Mischmodus in Photoshop – wie bei der Illustration oben. Dazu gehe ich unter MENU > EBENEN > und stelle einen anderen Mischmodus für die Ebene ein. Mit dieser Methode arbeite ich nicht-Destruktiv, und kann somit jederzeit eine Transparenz nach Wunsch verändern.

Mischmodus

Tausche dich aus im iADOBE FORUMAlle unsere Tipps als: i-adobe eBook in Deutsch

divider

Courtesy of Illustration Source

Courtesy of Illustration Source

View the artists’s homage on the topic: GOVERNMENT

Miriam Selmi Reed is represented by Illustration Source, New York City. Portfolio and contact: Illustration Source NYC

Illustration technique: watercolor, acrylic and pencil combined with digital mixed media using Adobe Photoshop and Illustrator.Copyright by Illustration Source, New York City.

Illustrations-Technik: Aquarell, Acryl mit Farbstift, gemischt mit Adobe Photoshop und Illustrator. Copyright by Illustration Source, New York City.

Smart

As instructors of Adobe programs and creative professionals, we’ve assembled this blog as easy reference for our students and clients.” Miriam Selmi Reed & Michael Alan Reed

English version:
Below is my personal way of cutting out an image with hard edges:
1. Open your image in Adobe Photoshop.
2. Duplicate your layer and select it.
3. Click TWICE on to the layer-mask icon so you will get a VECTOR MASK.
4. Select your Pen-Tool and follow the shape you would like to cut out.
5. Once you are done; click on the layer below and make it invisible.
6. To make alterations on your vector path, simply open the Properties or use the Direct-Selection-Tool to alter the vector points.

Another possible way to cut out an image using the Quick-Selection-Tool

Sharing infos: iADOBE FORUM Our tips for easy download: i-adobe eBook in English

Illustration by Miriam Selmi Reed – Courtesy of Illustration Source NYC

Deutsche Version:
Oben zeige ich mein persönlicher Tipp wie ich Bilder mit harten Kanten freistelle:
1. Öffne dein Bild in Adobe Photoshop.
2. Dupliziere deine Ebene und wähle diese an.
3. Klicke ZWEIMAL auf das Ebenenmasken-Icon damit eine VEKTOR-MASKE entsteht.
4. Wähle dein Zeichenstift-Werkzeug und folge dem Objekt, welches du freistellen möchtest.
5. Wenn du fertig bist, mach die untere Ebene unsichtbar.
6. Um weitere Korrekturen vorzunehmen, öffne die Eigenschaften oder klicke mit dem Direkt-Auswahl-Werkzeug auf die Vektoren und verschiebe deren Position.

Ein anderer schneller Weg ein Bild freizustellen mit dem Schnell-Auswahl-Werkzeug

Tipp! Adobe Photoshop – Die komplette Übersetzung Englisch > Deutsch in Photoshop CC

Tausche dich aus im iADOBE FORUMAlle unsere Tipps als: i-adobe eBook in Deutsch

divider

Courtesy of Illustration Source

View the artists’s homage on the topic: Finance and Debt

Miriam Selmi Reed is represented by Illustration Source, New York City. Portfolio and contact: Illustration Source NYC

Illustration technique: watercolor, acrylic and pencil combined with digital mixed media using Adobe Photoshop and Illustrator.Copyright by Illustration Source, New York City.

Illustrations-Technik: Aquarell, Acryl mit Farbstift, gemischt mit Adobe Photoshop und Illustrator. Copyright by Illustration Source, New York City.

divider

Your source for commissioned illustration: ORIGINAL ART STUDIOS in New York City.

OAS

Portfolio Original Art Studios, New York City: MIRIAM SELMI REED

Brushes in Adobe Photoshop

As instructors of Adobe programs and creative professionals, we’ve assembled this blog as easy reference for our students and clients.” Miriam Selmi Reed & Michael Alan Reed

English version:
In my illustration below, I’ve used paint brushes and layer masks in Adobe Photoshop.
1. Open your picture in Adobe Photoshop CC
2. Open your brushes under > Window > Brush
3. Create a new layer on top where you can paint and make a layer mask for corrections:
Step-by-step-guide: How to make a layer mask. To make changes in your layer mask is simple: use your brush and paint directly into your layer mask using black or white!

Check out the Adobe Create Magazine: Tutorials. Any questions? Contact us at iADOBE FORUM Our tips for easy download: i-adobe eBook in English

Deutsche Version:
In meiner Illustration benutzte ich die Pinsel und Ebenenmasken in Adobe Photoshop.
1. Öffne dein Bild in Adobe Photoshop CC
2. Öffne deine Pinsel unter > Fenster > Pinsel
3. Erstelle eine neue Ebene ganz oben zum pinseln und eine Ebenenmaske für allfällige Korrekturen: Schritt-für-Schritt Anleitung: Wie man eine Ebenenmaske erstellt. Man korrigiert eine Ebenenmaske ganz einfach indem man direkt mit einem weissen oder schwarzen Pinsel innerhalb der Maske malt!

Dann schau mal ins Adobe Create Magazine rein: Tutorials. Hast du Fragen? Kontaktiere uns unter iADOBE FORUM! Unsere Tipps zum herunterladen: i-adobe eBook in Deutsch

divider

View the artists’s homage on the topic PEACE ON EARTH at Portfolio Illustration Source

Courtesy of Illustration Source

Licensed illustrations by ILLUSTRATION SOURCE NYC: MIRIAM SELMI REED

Perspective!

“As instructors of Adobe programs and creative professionals, we’ve assembled this blog as easy reference for our students and clients.” Miriam Selmi Reed & Michael Alan Reed

divider

Deutsche Version siehe unten!
Photoshop Tip: I normally use the perspective option in Photoshop, to tilt the floor; as shown in my Illustration below. I open my Photoshop file and go to EDIT > TRANSFORM and choose PERSPECTIVE. With this method, I can alter the PERSPECTIVE as I wish; by simply pulling the anchor points to change it. Hit ENTER once you’re done.
Illustrator Tip: I’ve traced the outlines with Adobe Illustrator using Adobe CC: New Tracing Tools in Adobe Illustrator
ALL tips of this Blog combined in one 72 pages PDF for easy download: i-adobe book in English – Preview & download here

Illustration by Miriam Selmi Reed / Courtesy of Illustration Source

Deutsche Version:
Photoshop Tip: Ich benutze die Perspektiven-Option in Photoshop, um den Boden perspektivisch nach hinten zu kippen; wie man oben bei meiner Illustration sieht. Ich öffne meine Photoshop-Datei und gehe zu BEARBEITEN > TRANSFORMIEREN und wähle Perspektivisch. Mit dieser Methode kann ich die PERSPEKTIVE ändern indem ich an den Hebeln ziehe. Wichtig: mit der ENTER Taste bestätigen.
Illustrator Tipp: Ich habe die neuen Zeichnungswerkzeuge von Adobe CC benutzt um die Illustration unten zu zeichnen: Neue Zeichnungswerkzeuge in Adobe Illustrator
Alle Tipps von diesem Blog kombiniert in einem 72-Seiten PDF zum herunterladen: i-adobe book in Deutsch – Vorschau & Download hier

divider

Courtesy of Illustration Source

Courtesy of Illustration Source

View the artists’s homage on the topic: MONEY

Miriam Selmi Reed is represented by Illustration Source, New York City. Portfolio and contact: Illustration Source NYC

Illustration technique: watercolor, acrylic and pencil combined with digital mixed media using Adobe Photoshop and Illustrator.Copyright by Illustration Source, New York City.

Illustrations-Technik: Aquarell, Acryl mit Farbstift, gemischt mit Adobe Photoshop und Illustrator. Copyright by Illustration Source, New York City.

divider

Your source for commissioned illustration: ORIGINAL ART STUDIOS in New York City.

OAS

Portfolio Original Art Studios, New York City: MIRIAM SELMI REED

THE MOCK UP WORLD

Deutsche Version siehe unten!

How cool is that! Many years I spent time in Photoshop putting my designed CD Covers, websites, books etc. together for presentations to show it to clients… even though I’m teaching Photoshop since years it took me hours to make it look professional.

By accident I’ve found this link online:
MOCK UP WORLD

Since I’m working with MOCK UP world templates, it takes only minutes to present a new product to a client!

I’ve downloaded a few mock-ups for free to try out. At the moment, they offer a “freebie-package” since they would like to find new subscribers.
FREE MOCK UPS

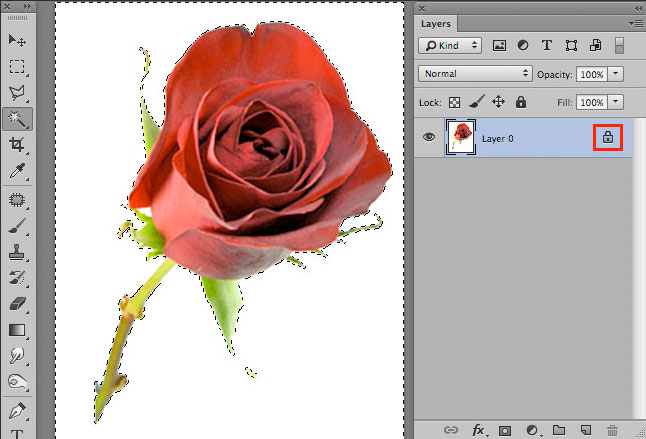
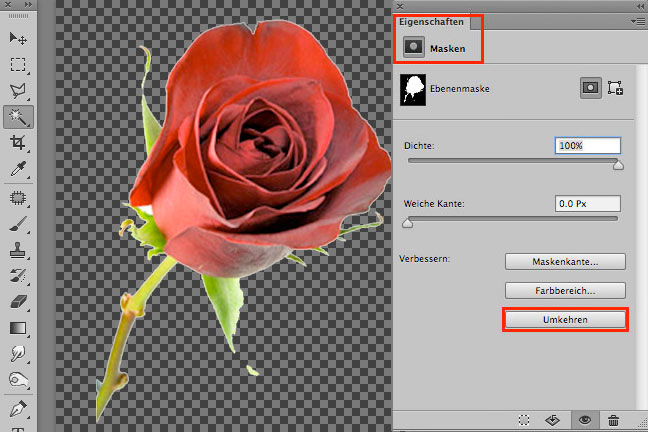
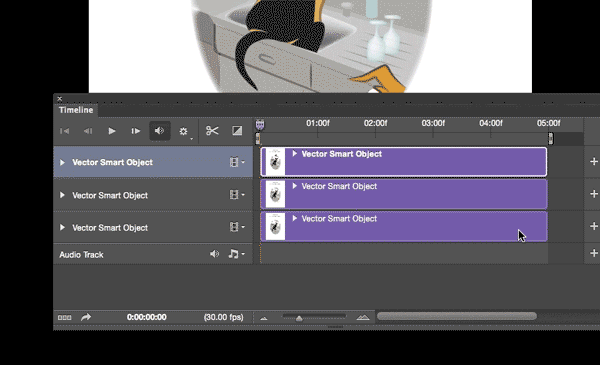
1. I open their Mock-up file in Adobe Photoshop
2. I click on the Smart-Object on the layer “Replace me”
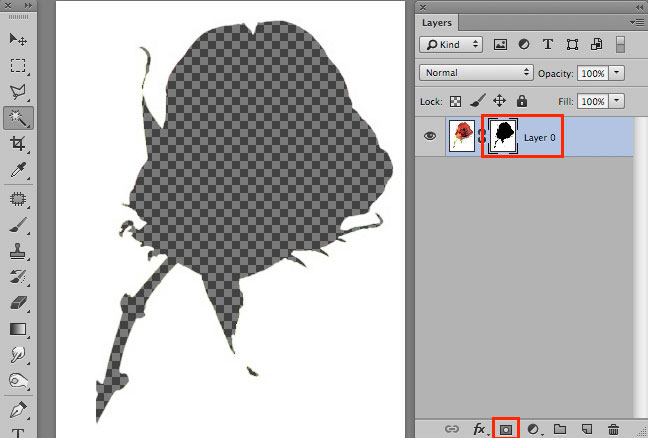
3. A new file opens, where I can place my own design
4. I hit the safe button once I’m happy; right after that, my own design gets applied into the Mock-up PSD document.
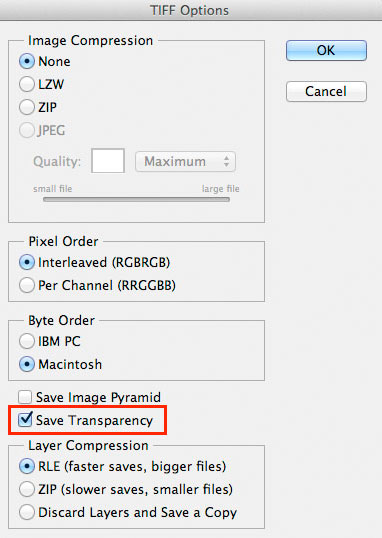
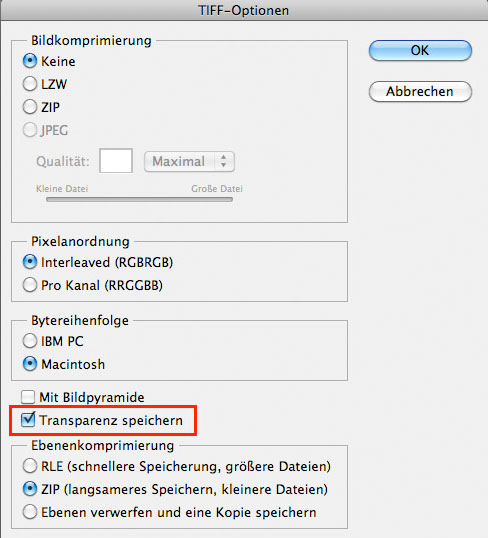
Now you are free to send an jpg per e-mail to a client, or place a Tiff into Indesign for printing.
HAVE FUN with Mock-up World!

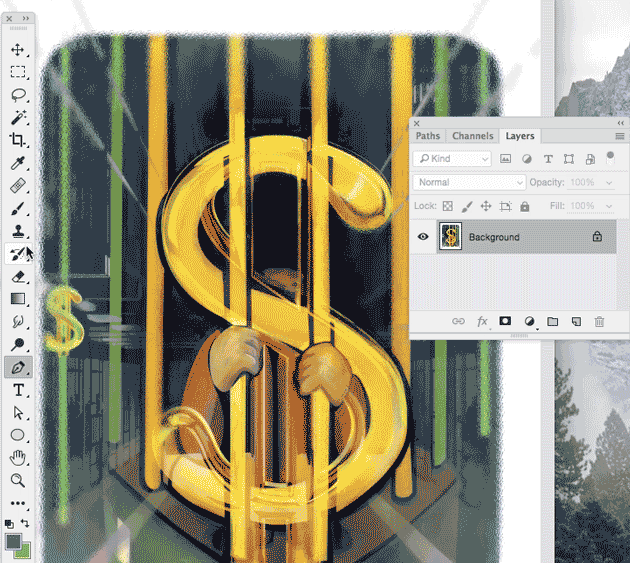
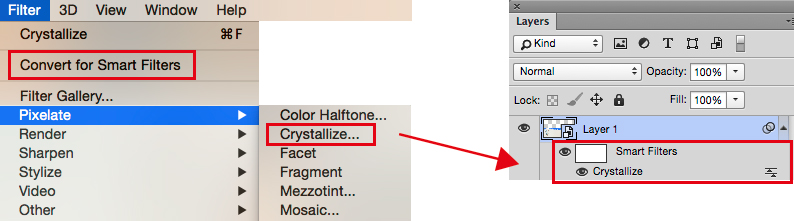
Cool tip on how to use: SMART OBJECTS

ALL tips combined in one PDF: i-adobe book in English – Preview & download here

replaceme

Deutsche Version:

Eine super Sache! Viele Jahre habe ich verbracht in Photoshop meine Bücher, CD Covers, Webseiten und Broschüren mühsam für Präsentationen “zusammen-zu-stiefeln”… und trotz allen Photoshop Kenntnissen, sah das Resultat doch nicht so professionell aus…

Per Zufall habe ich dann online diesen Link entdeckt:
MOCK UP WORLD

Seit ich Mockup World gefunden habe, ist es eine schnelle Sache für mich ein neues Produkt meinen Kunden vorzustellen!

Um es mal auszuprobieren habe ich mir ein paar gratis Mock-ups heruntergeladen. Im Moment gibt es sogar ein Freebie-packet da sie neue Subscribers finden wollen.
GRATIS MOCK UPS

1. ich öffne die Mock-up Datei in Adobe Photoshop
2. ich klicke auf das Smart-Objekt auf der Ebene “Replace me”
3. eine neue Datei öffnet sich, worin ich mein eigenes Design einfügen kann
4. wenn ich zufrieden bin, speichere ich; denn damit wird mein eigenes Design ins Mock-up PSD übernommen.
Dann steht es mir frei entweder ein jpg per e-mail an meinen Kunden zu schicken, oder ein Tiff ins Indesign einzufügen und auszudrucken.
VIEL SPASS mit Mock-up World!

Weiterer Tipp wie man: SMART OBJEKTE benutzt.

Alle Tipps kombiniert in einem PDF: i-adobe book in Deutsch – Vorschau & Download hier

Get creative in 2017!

divider

Deutsche Version siehe unten!
Photoshop Tipp > SMART FILTERS: When I’m using Filters in Adobe Photoshop as shown on my Illustration below, I first go under MENU > FILTER > Convert for Smart Filters. With this method, I can apply every filter and work non-destructive. I open my layers and click on my Smart-Filter-icon which opens the previous chosen filter settings so I can make my adjustments.
More tipps on how to work with SMART OBJECTS : COMBINE Adobe Illustrator with Photoshop!
ALL tips of this Blog combined in one 72 pages PDF for easy download: i-adobe book in English – Preview & download here

smart-filters

Deutsche Version
Photoshop Tip > SMART FILTER: Wenn ich in Adobe Photoshop Filter benutze – siehe unten – dann gehe ich unter MENU > FILTER > Konvertieren für Smart Filter. Mit dieser Methode arbeite ich nicht-Destruktiv , und kann somit jeden Filter löschen oder nach Wunsch verändern. Dazu öffne ich mein Ebenen-Bedienfeld und klicke auf meinen Smart-Filter-Icon, damit sich der vorher gewählte Filter wieder öffnet und ich Änderungen vornehmen kann.
Mehr Tipps wie man mit SMART OBJEKTEN arbeitet : kombiniere Adobe Illustrator mit Photoshop!
Alle Tipps von diesem Blog kombiniert in einem 72-Seiten PDF zum herunterladen: i-adobe book in Deutsch – Vorschau & Download hier

divider

ARTIST OF THE MONTH – SIS in NYC:

Courtesy of Illustration Source

Courtesy of Illustration Source

Miriam Selmi Reed is represented by Illustration Source, New York City. Portfolio and contact: Illustration Source NYC

Illustration technique: watercolor, acrylic and pencil combined with digital mixed media using Adobe Photoshop and Illustrator.Copyright by Illustration Source, New York City.

Illustrations-Technik: Aquarell, Acryl mit Farbstift, gemischt mit Adobe Photoshop und Illustrator. Copyright by Illustration Source, New York City.

View the SIS artists’s homage on the topic: New Beginnings!

SCAN !

divider

Deutsche Version siehe unten!
Scan Tip: I love to scan my drawings and open them in Adobe Photoshop, as shown on my Illustration below. I use a simple scanner and use a high dpi setting. In Adobe Photoshop I use LAYERS > as well as TRANSPARANCIES so I can paint on a layer on top of my scan, working non-destructive. I also use mostly LAYER MASKS when I have to erase parts of my work. I simply avoid destructive methods like the “eraser tool”!
Step-by-step guide for layer masks: LAYER MASKS in Adobe Photoshop.
ALL tips of this Blog combined in one 72 pages PDF for easy download: i-adobe book in English – Preview & download here

Deutsche Version
Scan Tipp: Ich scanne meine Zeichnungen gerne ein und öffne sie in Adobe Photoshop, wie ich unten bei meiner Illustration zeige. Ich benutze einen normalen Scanner mit einer hohen DPI Einstellung. In Adobe Photoshop benutze ich EBENEN > und TRANSPARENZEN damit ich auf der Ebene oberhalb meines Scans nicht-destruktiv arbeiten kann. Ich benutze zudem immer EBENENMASKEN wenn ich Teile meines Bilder löschen möchte. Ich vermeide prinzipiell das “Radiergummi-Werkzeug” welches Pixel unwiderruflich löscht!
Hier sind die Arbeitsschritte dazu: EBENEN-MASKEN in Adobe Photoshop.
Alle Tipps von diesem Blog kombiniert in einem 72-Seiten PDF zum herunterladen: i-adobe book in Deutsch – Vorschau & Download hier

divider

Courtesy of Illustration Source

Courtesy of Illustration Source

View the artists’s homage on the topic: WALL STREET

Miriam Selmi Reed is represented by Illustration Source, New York City. Portfolio and contact: Illustration Source NYC

Illustration technique: watercolor, acrylic and pencil combined with digital mixed media using Adobe Photoshop and Illustrator.Copyright by Illustration Source, New York City.

Illustrations-Technik: Aquarell, Acryl mit Farbstift, gemischt mit Adobe Photoshop und Illustrator. Copyright by Illustration Source, New York City.

divider

Your source for commissioned illustration: ORIGINAL ART STUDIOS in New York City.

OAS

Portfolio Original Art Studios, New York City: MIRIAM SELMI REED

COMMUNICATION & POLITICS

divider

Photoshop Tip: What is the difference between assign a color profile or to convert a color profile? Here it is: Assign / convert a color profile in Adobe Photoshop!
“I personally work in my Photoshop illustration file in Adobe RGB and leave all the layers, masks and paths intact. Once my illustration is done, I flatten the PSD file, get rid off all paths and save it out as a Tiff file. My agent SIS prefers RGB files while my printer wants a CMYK file and he lets me know the preferred color profile his printing press wants. The key to this problem: communicate with your client/printer!”

Deutsche Version
Photoshop Tipp: Was ist der Unterschied zwischen Farbprofil zuweisen oder umwandeln? Hier ist die Anleitung dazu: Wie man Farbprofile umwandelt / zuweist in Adobe Photoshop!
“Ich arbeite gerne “nicht destruktiv” mit Adobe Photoshop und bleibe in Adobe RGB mit allen Ebenen, Masken und Pfade. Wenn meine Illustration fertig ist, reduziere ich meine Datei auf eine Ebene und speichere es als Tiff Datei. Mein Agent SIS möchte RGB files, meine Druckerei möchte aber CMYK files und er lässt es mich wissen, welches Farbprofil ich verwenden soll. Die Lösung zum Problem: kommuniziere mit dem Kunden/Druckerei!”

divider

IMAGE OF TODAY – ILLUSTRATION SOURCE IN NEW YORK CITY:

Courtesy of Illustration Source

Courtesy of Illustration Source

View the artists’s homage on the topic: COMMUNICATION & POLITICS

Miriam Selmi Reed is represented by Illustration Source, New York City. Portfolio and contact: Illustration Source NYC

Illustration technique: watercolor, acrylic and pencil combined with digital mixed media using Adobe Photoshop and Illustrator.Copyright by Illustration Source, New York City.

Illustrations-Technik: Aquarell, Acryl mit Farbstift, gemischt mit Adobe Photoshop und Illustrator. Copyright by Illustration Source, New York City.

divider

Your source for commissioned illustration: ORIGINAL ART STUDIOS in New York City.

OAS

Portfolio Original Art Studios, New York City: MIRIAM SELMI REED

LAB colors / LAB Farben in Photoshop

divider

Deutsche Version siehe unten!
TIP OF THE MONTH:
“How I quickly change my brightness with Adobe Photoshop WITHOUT changing my colors”:

To get the my best result; I change my illustration under IMAGE > MODE to 16 Bit and then go to IMAGE > MODE and select Lab Color.

With this trick I’m able to change the brightness seperately from my colors! Here is the step-by-step guide: How to work with the Lab Color Mode in Photoshop.

lab

Deutsche Version
TIPP DES MONATS:
“Wie ich die Helligkeit mit Adobe Photoshop anpasse OHNE meine Farben zu verändern”:

Um mein bestes Resultat zu erreichen, ändere ich meine Illustration unter BILD > MODUS auf 16 Bit, gehe dann zu BILD > MODUS > und wähle den Modus Lab-Farbe.

Mit diesem Trick kann ich meine Helligkeiten separat von den Farben ändern! Hier ist ist alles im Detail erklärt: Wie man mit dem Lab-Farbe-Modus in Photoshop arbeitet.

Courtesy of Illustration Source

Courtesy of Illustration Source

View the artists’s homage on the topic: THE GRADUATE

Miriam Selmi Reed is represented by Illustration Source, New York City. Portfolio and contact: Illustration Source NYC

Illustration technique: watercolor, acrylic and pencil combined with digital mixed media using Adobe Photoshop and Illustrator.Copyright by Illustration Source, New York City.

Illustrations-Technik: Aquarell, Acryl mit Farbstift, gemischt mit Adobe Photoshop und Illustrator. Copyright by Illustration Source, New York City.

Photoshop resolution / Auflösung

Tutorial in English and German / Anleitung in Deutsch und Englisch

Deutsche Version siehe unten!
divider

English version:

TIP OF THE WEEK: How to reduce or enlarge a Photoshop file

Below I show the steps of my job; to prepare my illustration at a 300 dpi resolution, 7 inches wide for Adobe InDesign. Go to MENU > IMAGE > IMAGE SIZE:

reduceImage

In my example I use 7 inches Width, because I will place this image in my InDesign document with this size. In your case, you simply use your desired Width (or Height) and place it into your InDesign document at a 100%. With this method you will retain the 300 dpi resolution for the professional printing press.

divider

Deutsche Version:

TIPP DER WOCHE: Wie man ein Bild in Photoshop vergrössert oder verkleinert.

Unten zeige ich die Arbeitsschritte; wie ich meine Illustration auf 300 dpi ändere und als 15 cm breites Bild für Adobe InDesign vorbereite. Gehen Sie zu MENÜ > BILD > BILDGRÖSSE:

reduceImageD

In meinem Beispiel benutze ich 15 cm Breite, weil ich dieses Bild mit diesen Massen in meinem InDesign Dokument benötige. Benutzen Sie in Ihrem Fall Ihre gewünschten Masse und platzieren Sie es zu 100% Grösse in Ihr InDesign Dokument. Mit dieser Methode werden Sie die 300 dpi für die professionelle Offset-Druckmaschine beibehalten.

Animate with Photoshop in 2016

The following illustration was created by Mimi Selmi Reed (webdesign: Adobe Muse) with pencils and water color – traced and executed in Illustrator & Photoshop – animated in Adobe Photoshop CC.
(Tutorial see below / Anleitung siehe unten)

Copyright by Miriam Selmi Reed - member SCBWI - all rights reserved.

Copyright by Miriam Selmi Reed – member SCBWI – all rights reserved.

Every Follower, Like and comment is welcome! More comics & cartoons at: Z-DOG COMIC

divider

ENGLISH:
Animations with Photoshop / Animationen mit Photoshop:
Photoshop timeline for animations is under Window > Timeline. Have fun!
How to create frame animations in Photoshop

DEUTSCH:
Die Photoshop-Zeitleiste für Animationen kann man unter Fenster > Zeitleiste finden. Viel Spass!
Erstellen von Frame-Animationen in Photoshop

animation

Today’s Topic: TRANSPARENCY

divider

Photoshop Tipp > BLENDING MODE: I love to use Blending Modes in my layers, as shown on my Illustration below. I first go under MENU > LAYERS > and select a different Blending Mode for the layer. With this method, I can apply different transparencies to my layers and work non-destructive.

Blendingmode

divider

Photoshop Tip > MISCHMODUS: Ich benutze gerne den Mischmodus in Photoshop – wie bei meiner Illustration unten. Dazu gehe ich unter MENU > EBENEN > und stelle einen anderen Mischmodus für die Ebene ein. Mit dieser Methode arbeite ich nicht-Destruktiv, und kann somit jederzeit eine Transparenz löschen oder nach Wunsch verändern.

Mischmodus

divider

Miriam Selmi Reed represented and licensed by Illustration Source - Courtesy of Illustration Source

Miriam Selmi Reed represented and licensed by Illustration Source – Courtesy of Illustration Source

View the artists’s homage on the topic: TRANSPARENCY

Miriam Selmi Reed is represented by Illustration Source, New York City. Portfolio and contact: Illustration Source NYC

Illustration technique: watercolor, acrylic and pencil combined with digital mixed media using Adobe Photoshop and Illustrator.Copyright by Illustration Source, New York City.

Illustrations-Technik: Aquarell, Acryl mit Farbstift, gemischt mit Adobe Photoshop und Illustrator. Copyright by Illustration Source, New York City.

divider

Your source for commissioned illustration: ORIGINAL ART STUDIOS in New York City.

OAS

Portfolio Original Art Studios, New York City: MIRIAM SELMI REED