Tutorial in English and German / Anleitung in Deutsch und Englisch
Deutsche Version siehe unten!
![]()
English version:
Would you like to receive our tips for free in your e-mail box? Simply select FOLLOW to sign up with your e-mail address.
TIP OF THE WEEK: How to enlarge an image in Photoshop Creative Cloud.
With this method your Image Size (Pixel Dimension) is going to be changed. This should be only done once, since altering the Image Size too many times will cause a blurry image! (If you’d like to keep the Image Size the same; please click on TIP 2 below)
One possible solution: Go to MENU > IMAGE > IMAGE SIZE.
1. Pay attention to the Image Size
2. Make sure your Width and Height are connected so the image remains in proportion – see chain symbol! The Resample BOX needs to be activated! With this option you are able to change the Width / Height and Resolution separately. In CS6 the Resample box is called: Resample Image, but it has the same function.
3. Notice the Resolution (dpi = dots / pixels per inch)

4. Before you click OK, enlarge the Resolution or even double it
5. Pay attention again to the Image Size on top (On the left you see the new image size!)
6. You can select different options right next to the Resample Box. (We have chosen “Preserve Details” for Enlargements)
7. Drag the Reduce Noise slider to the right a bit to see what happens; which is a new feature in Adobe CC (see image below)
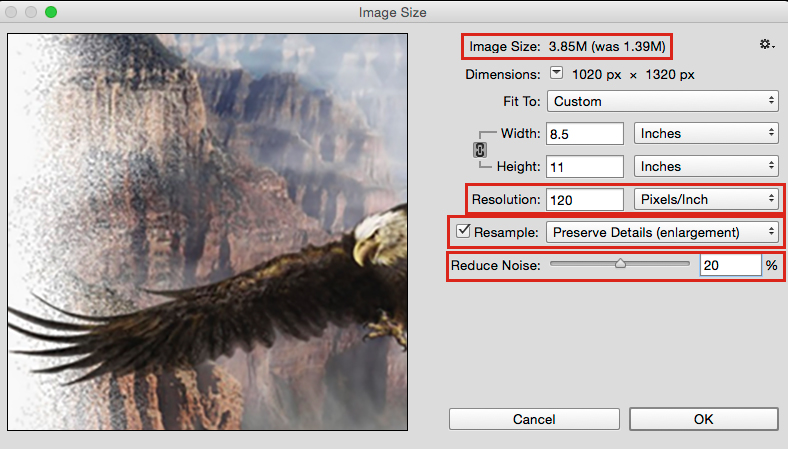
Once you’re happy with the preview: HIT OK! But don’t forget: enlargements over 150% will pixelate more and more… especially if you sharpen the image later.
IMPORTANT: a professional printer needs your image at 300 dpi for the printing press. 120 dpi should be good enough for your own small Desktop Printer in your office. 72 dpi is usually the correct setting for images on the internet.
There are additional cool tricks on how to enlarge an image without loosing quality – but that is Mike Reed’s expertise; and he doesn’t show it for free > Buy Mike a cup of coffee 🙂
![]()
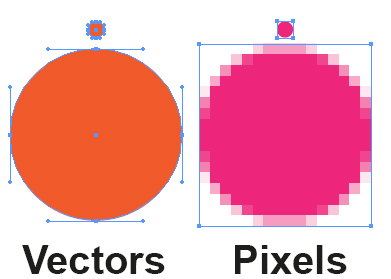
TIP 2: additional tutorial for Adobe Photoshop CS5 and CS6 on how to change an image without changing the Pixel Dimensions (Image Size): PIXEL IS KING
![]()
Deutsche Version:
Möchten Sie unsere gratis Tipps in Ihrem e-mail erhalten? Schreiben Sie sich unter FOLLOW mit Ihrer e-mail Adresse ein.
TIPP DER WOCHE: wie man ein Bild in Photoshop Creative Cloud vergrössert.
Mit dieser Methode wird die Bildgrösse (Pixelmasse) jedoch verändert und sollte nur einmal angewendet werden, um eine “starke Verpixelung” zu vermeiden.
(Eine andere Methode bei der die Bildgrösse (Pixelmasse) gleich bleiben; siehe unten TIPP 2).
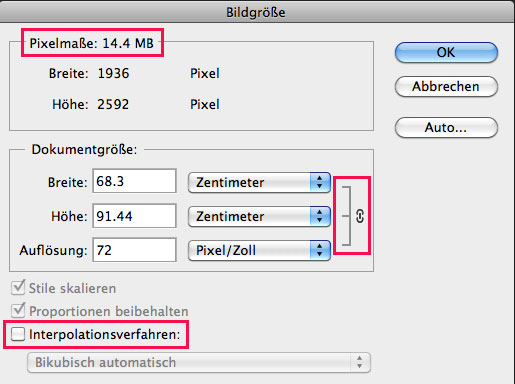
Eine mögliche Lösung: Gehen Sie zu MENÜ > BILD > BILDGRÖSSE.
1. Achten Sie auf die Bildgrösse
2. Es ist wichtig, dass die Breite und Höhe miteinander verknüpft sind. Beachten Sie das Ketten-Symbol! Dazu muss die Neu berechnen BOX aktiviert sein; Mit dieser Option haben Sie die Möglichkeit die Breite / Höhe separat von der Bildauflösung zu verändern. In CS6 hat die Neu berechnen Option einen anderen Namen: das Interpolationsverfahren. Die Funktion ist jedoch dieselbe.
3. Achten Sie auf die Auflösung (dpi = dots / pixels pro inch = in Europa benutzen wir Zoll anstelle von inch)

4. Bevor Sie auf OK klicken, vergrössern oder verdoppeln Sie die Auflösung
5. Achten Sie wieder auf die Bildgrösse oben (Links sehen Sie die neue Bildgrösse!)
6. Sie können von verschiedenen Optionen neben der Resample Box wählen. (Wir haben “Details erhalten für die Vergrösserung” gewählt)
7. Ziehen Sie den Rauschen reduzieren Hebel nach Bedarf nach rechts und schauen Sie was passiert. (siehe Bild unten) Dies ist eine neue Option in Adobe CC.

Wenn Sie mit der Vorschau zufrieden sind: Klicken Sie auf OK! Nicht vergessen: Vergrösserungen über 150% zeigen die Pixel mehr und mehr… vor allem wenn Sie das Bild nachträglich noch verschärfen.
WICHTIG: ein professionelle Offset-Druckerei verlangt Ihr Bild mit einer 300 dpi Auflösung (Resolution). 120 dpi ist normalerweise genügend gross für Ihren kleinen Drucker in Ihrem Büro. 72 dpi genügt jedoch meistens für Fotos auf dem Internet.
Es gibt noch einige cool tricks wie man ein Bild ohne Qualitätsverlust vergrössert – aber das ist Mike Reed’s persönliche jahrelange Erfahrung; und dies zeigt er natürlich nicht gratis > Kauf Mike einen Kaffee 🙂
![]()
TIPP 2: Weitere Infos wie man ein Foto in Adobe Photoshop CS5 bis CS6 anpasst OHNE dass die Pixelmasse (Bildgrösse) verändert werden: PIXEL IST KÖNIG
![]()